Dear California Photo Festival Attendees!
We are getting very close to festival time and we hope you are getting excited!
Here are a some important things to know and to bring on your trip for a smooth and memorable experience during the week!
There is a lot of information, but
it is important that you read through it all so you can make the most out of your experience at Click!
1. Make sure you print out your schedule right before you leave!
To do this use the Export my Schedule button at the top of your schedule after logging into Click.
Each attendee has been given their own account to the festival controlled by your own user name and password. You are in charge of creating and SAVING your own schedule. We do not assume responsibility if you have not successfully saved your schedules. If you have not successfully saved your schedule and find your classes are full, we at Light and the CPF team, will do our best to suggest appropriate classes for you but are NOT obligated to add you to full classes.
**Keep your attendee schedule on you AT ALL TIMES during the festival.
2. Check-in
: The Check-in station will be located at Embassy Suites. Check-in is open Wednesday 6:30am-1pm; Thursday/Friday/Saturday 7am-1pm; and Sunday 8am-10:30am. You will receive your Festival Badge, Canon sponsored Festival t-shirt (week passes only), festival swag bag, and festival booklet at check-in.
**For those of you who are signed up for a sunrise workshop and have a day pass, you must check-in the day before to get your pass. If, for some reason you cannot make the check-in times you must contact us before the festival starts to make alternative arrangements. YOU MUST HAVE YOUR FESTIVAL PASS ON AT ALL FESTIVAL EVENTS OR YOU WILL BE ASKED TO LEAVE.
3. Workshops
: When you arrive at your festival events you will need to first sign-in with the volunteer on duty. Each volunteer will have an attendee list (printed the day prior) for each of the festival events. If you are not on the attendee list and the class is full, you will be asked to leave and find another workshop to attend. We are trying to keep all of our classes below a certain number so that each attendee has a chance to have some hands-on time with the instructors.
**Please be respectful of this system. Again, if you simply show up without having added the class to your schedule, you will be turned away from full classes.
4. The Festival booklet
: The Festival booklet will have important information on all of our festival events, instructors, and the local area, including GPS coordinates, announcements and other festival information needed to make a successful week for you. You will receive the booklet at check-in. No additional copies will be available so please keep it handy and keep it safe at all times.
5.
A few of our events during the festival are comprised of "Part 1" and "Part 2" sessions. We understand that there are many awesome events to take, but these Part 1 sessions ARE IMPORTANT for you to participate in the following sessions. If your workshop has an intro "Part 1" please make sure you have signed up for these before going to the following sessions.
These "Part 1" sessions is where you will be given the necessary instruction to participate in "Part 2".
**Our instructors will NOT be repeating the information discussed in prior sessions out in the field as there won't be time to cover the basic important concepts during the shooting times.
6. Dinner with a Pro (DWP)
If you are signed up for a Dinner with a Pro, you are responsible for chipping in and paying for the instructors tab at the end of dinner. The wait-staff will divide the bill amongst the group to make this happen equally. If you want to volunteer to solely pick up the instructor tab you may do so, just let the waitstaff know when you arrive. You will know where your restaurant will be once the festival starts. We will have additional sign-up sheets and information at the check-in desk located at Embassy suites for those who are looking to sign up last-minute.
**If an instructor is not scheduled for a DWP do not hesitate to ask us to set one up! We will make the arrangements to make it happen! Let Victoria or the Check-in volunteers know and we will do what we can to assist.
7. LIGHT Computer Lab
: Some of the festival events will be held at the LIGHT Workshops computer lab. You are welcome to bring your own laptop to work on or use one of the LIGHT computers. If you choose to use a LIGHT Computer, you will need to have a PC compatible external hard drive to access and download your images. Please do not download images directly to the LIGHT Lab computers. Your images will not be saved on our machines. For more information about the LIGHT computer lab click here
Some recommendations of what to bring::
-Valid form of picture ID.
-Your most up-to-date festival schedule.
-Laptop computer: If available, so you can work on your images at night and take notes or follow along with instruction during lectures.
-Wind jacket/rain jacket in case our coastal weather decides to give us some great clouds to photograph!
-A Hat: A sun hat and a warm hat is good to have in your box of tricks for the outdoor shoots as well as the early morning and sunset shoots, it can be windy when the sun is down.
-Sunscreen.
-Water bottle: We will also have water stations at Embassy suites for your water needs through the week.
-Snacks: You never know if you're going to be out shooting past breakfast and lunch! Don't be caught hungry.
-Camera bag: Camera, battery, CF cards, SD cards, lenses, battery charger, tripod, external hard drive and/or flash drive
-Hiking shoes: Some workshops will have a small amount of hiking, scrambling, beach walking and mud to trample through.
-Cell phone charger
-iPad and charger: Download our festival app so you can read up about your instructors throughout the week!
-Extra pair of clean shoes: to change into when entering into Light Workshops and the hotels/restaurants in the area. Don't make your mark by being muddy!
-Cash: Some restaurants in Los Osos, Cayucos and other areas only accept cash. Our raffle will only accept cash as well and you will want to get in on these awesome prizes!
-Additional Forms of Payment: We will have a few vendors at Embassy Suites like Samy's Camera, Alpha Strike Paper company, Really Right Stuff and a few others who will be able to sell items to you during the festival week. Some of our vendors will also offer special pricing for buying on site.
**Look for additional gear suggestions in the event descriptions on your schedule!
Events you won't want to miss!
Wednesday 8am: Opening Ceremony: Including some great announcements that you won't want to miss
Wednesday Afternoon: Parish Kohanim's Canon Sponsored lecture: All are welcome, open to the public
Wednesday Evening: Dinner with a Pro! Sign up online now! Suggest additional instructors to dine with!
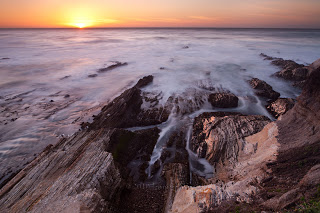
Thursday: Festival on the beach! Just imagine 200+ photographers at Morro Bay's Rock!
Friday: Dinner with a Pro! Sign up online now! Suggest additional instructors to dine with!
Saturday: Festival Open House at Light Photographic Workshops
Sunday: Rick Sammon Keynote, Festival Raffle: prizes from Adobe, Nik, Canon and many more! And a closing presentation by Canon regional rep Jim Rose!
Festival Photo Contest
This year we are sponsored by SmugMug for our photo gallery of your images during the festival!
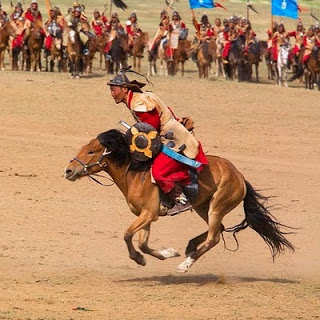
Please read through the terms and conditions for the gallery. You will see that it is a great way to help share your images and get noticed by our models, sponsors, instructors and fellow attendees who will be going to the site. We hope that all of you utilize the gallery and help us allow our models and horse riders to contact you for your images for their portfolio and as a thank you for giving you and our festival these incredible opportunities. Once all of the images are uploaded our instructors and team here at Light will go through them all and take your votes and our votes to announce the "Top 3 Images of the 2011 Festival" in order to win one of 3 incredible prizes. More info will be shared as we get through the week!
Please Remember:
Be courteous when out shooting. We are invited guests to many of our venues and we must remember to be respectful and grateful to our hosts. Please, also be respectful and considerate to our fellow attendees and instructors around you. We are all here to have a good time, take turns and get as much education out of the week as we can!
FAQ and more information:
Utilize our Facebook Page!
Carpooling, announcements, information, more FAQ, correspondence and more are all listed on our Facebook page. You can even get a great outline on model release and property release information on our discussions board.
**This letter will be posted on our discussion board as well.
Make sure you check-out our Terms and Conditions for very important and legal information including information about model, property and event image rights and usage. Please read through it to stay informed and protected. You should also take a look at our FAQ page in case any of your questions might be on there. If you have additional questions for the staff and team here at Light please let us know.
We want to thank each and every one of you who have signed up this year. This is an amazing opportunity for us here to have these incredible instructors join us in this beautiful area and celebrate what we all love! We are happy to make it happen as it is a passion of ours. We thank you for coming this year and we hope to see you back for years to come!
-Victoria and Hal Schmitt and the Light Team.