• Home
  • Hal and Victoria Schmitt
  • Contact
  • Blog
Menu

LIGHT Photographic Workshops

Street Address
Templeton, CA 93465
805-550-4274

Your Custom Text Goes Here

LIGHT Photographic Workshops

  • Home
  • Instructors
    • Hal and Victoria Schmitt
  • Info
    • Contact
    • Blog
20110327_MdO_Poppy-64.jpg

Blog

LIGHT Photographic Workshops blog discusses everything photography related. Adobe updates, computer suggestions, accessories that can save your life and more!

Going Back Out for More

July 14, 2011 Light Photographic Workshops

Heading back out onto the water this afternoon for another photo tour of south east Alaska's amazing scenery and wildlife.  Took a quick a break in Petersburg after the first trip.  I needed a little time to catch up on sleep as we were shooting all day for over a week.

We had another incredible trip filled with amazing photography, incredible camaraderie, good food and wine, and pure fun. I look forward to sharing some of the images we made and the techniques used to capture them once I get back down to Cali. 

​Lion's Mane

​Lion's Mane

Humpback tail and barnacles

Humpback tail and barnacles

Rolling in

Rolling in

Fiat Lux!

In for fun Tags Alaska, digital photography, photo tour, Hal Schmitt, Bull Schmitt, humpback whale, eagle, otter, bald eagle
1 Comment

"Mask" with Blend Modes for Easy Composites

May 24, 2011 Light Photographic Workshops

The two images above do not really work for me separately.  I thought they might look better combined so I played around with them a bit.  I am not a big fan of spending a large amount of time selecting or masking unless I absolutely must.  When I do mask I use either Photoshop alone or Topaz Remask.  For this composite, I wanted to try a blend mode switch and see if I could avoid any selections or masks.  The process I used is below.

The first step was to create a stack by layering the two images in Photoshop.  I used the trees as a background and added a few Curves Adjustment Layers to fix tonal range, color cast, and add contrast (you could also do that in Lightroom first.)  At the top of the layer stack is my eagle fight shot.  I moved the eagles into a possible position and am now ready to try a blend mode switch.

With the eagle layer active I changed the blend mode to Darken.  The Darken blend mode works by displaying only the parts of the active layer that are darker than underlying pixels (in lower layers.)  I thought the eagles are darker than the sky so maybe it would work.  Unfortunately, the sky in the eagle layer is darker than the background sky.

To fix this little issue, I added a Curve Adjustment Layer and set it to affect only the eagle layer.  To do this click on the the click to clip to layer icon that looks like a dark circle on top of a light circle at the bottom of the Adjustments panel or hold down the Alt/Opt key and click on the line separating the eagle layer from the Curve layer (you will know you are in the right place when your cursor changes to the dark/light circle icon.)  When we set up a clipped layer the adjustment will only effect the layer it is clipped to.  In this case, the curve only modifies the eagle.  As I drag the curve up notice less of the sky around the eagles is visible.

I continued to move the curve up until the sky on the eagle layer was lighter than the sky of the background.  Now only the eagles themselves show up with the Darken blend mode.

Final step for me was a Black and White adjustment layer.  Not sure I will ever use the image but I like the result better than where I started and the technique is a great tool to have in your kit.  This also works in reverse using the Lighten blend mode.

​The final composite

​The final composite

Fiat Lux!

In tips Tags Adobe, Photoshop, Hal Schmitt, Bull Schmitt, bald eagle, eagle
3 Comments

Eagle Tips

May 19, 2011 Light Photographic Workshops
​Dial it up (as we used to say at TOPGUN)

​Dial it up (as we used to say at TOPGUN)

As many of you know I am a big fan of photographing eagles (might be that fighter pilot thing again.)  There are a huge number of tips and tricks when shooting eagles but I will give two of the simplest.  These two might seem a little bit flippant and MOTO (master of the obvious) but they are true.

My best tip is go where there are a large number of eagles.  The rock above has 19 eagles on it.  What is not shown are the other 30 rock outcroppings just like this one covered with birds or the trees full of birds.  When you surround yourelf with 500-1000 eagles you will have a much higher probability of getting the shots you want.  Photographing eagles in flight is not the easiest task so the more you shoot the better.  Tough to do as you wait for the lone bird to fly by again.

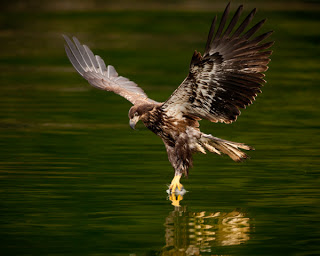
Tip number two often goes hand in hand with number one, go where this is a non-stop supply of eagle food.  I have no problem with feeding eagles to get images but there is a finite amount of frozen herring.  Food equals eagle action.  The birds will feed almost non stop.  I have seen eagles feed until there are fins sticking out their beaks.  With plenty of birds and food you increase your opportunity in a major way.  In the image above the fish are literally jumping out of the water into the waiting talons of the approaching eagle.  There is also something a little more raw and natural about a freshly ripped apart herring; half in the beak and half in the talons.  In the gory image above note there is another whole herring in the talons as well.

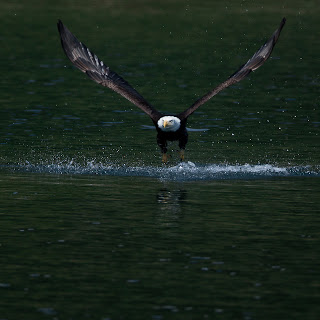
As I mentioned, feeding to attract eagles is not really any different than planting flowers to attract butterflies or using sugar water to bring in hummingbirds to an elaborate flash setup.  I do believe in full disclosure though and will discuss if an eagle was baited or not.  Most often it is pretty easy to tell if there is a fish in the frame (in the water or in the talons/beak.)  Recently caught live fish bleed and still look alive.  Frozen herring are slightly discolored, the tail contracts, and the eye is very dead.  For example, check out the gull below picking up a frozen herring.

A few more shots for giggles.

​Yep, the sky was that blue.

​Yep, the sky was that blue.

Love the dirty birds (juveniles)! Notice the bright spot in the talons.  Normally a piece of bait...as it is here.

Love the dirty birds (juveniles)!
Notice the bright spot in the talons.  Normally a piece of bait...as it is here.

Fiat Lux!

In tips Tags Alaska, eagle, bald eagle, Hal Schmitt, Bull Schmitt, photo tour
Comment

Composite Images for Easy Expanded DOF

May 18, 2011 Light Photographic Workshops

I shot the two images above for this demo while onboard our yacht tour a couple weeks ago.  We weren't in perfect position for the composition I really wanted but pixels are free so I shot anyway.  The eagles are separated from the mountain and glacier background by about 10 miles.  I had a Canon 400mm f/2.8L on my 7D at the time and could not get both foreground and background in focus with the given focal distance.  I decided to quickly shoot with eagle focus and again with glacier focus; the only thing that changed between shots was focal point.  Although I was on a tripod the boat was moving so there was a slight shift in the images. 

Once back in Lightroom I performed some basic optimization, selected both images, synchronized, right clicked, and chose the option shown below.  If you are working Bridge, the same optimization and synchronization may be done via ACR.  Select both images and then choose Tools-Photoshop-Load files into Photoshop Layers.

With a stack (a multi layer image in which each layer comes from an individual image) in Photoshop I needed to do some masking in order to selectively reveal and conceal each layer.  I wanted the foreground from one image (with the eagles in focus) and the background from the other (mountain and glacier.)  As always with Adobe I had at least three options: 1) I could add a mask to my top layer and then use a brush to paint. or 2) I could select the eagles and rock in the foreground and then add a mask (turning my selection into a mask.) or 3) I could let Photoshop do the work and Auto-Blend.  The Auto-Blend option (Edit-Auto-Blend Layers)when set up as below uses contrast as a discriminant to build a mask.

There are two main "gotchas" with Auto-Blend.  The first is if there is a shift in the images you might need to Auto-Align first.  Interestingly, in this case Auto-Align did not work as the images were fairly different without enough common pixels to scene map.  Second, to activate Auto-Blend as an option multiple layers must be selected.  Use click + shift click functionality to select multiple layers.  

After the blend, Photoshop gave me the layer masks you see above.  Not perfect but pretty good and extremely fast.  I made a few more changes to the images in order to correct color and boost contrast in the background.  I used a Curve adjustment layer for color correction and then stamped visible and set the resultant pixel layer to the Multiply blend mode with a reduced Opacity.  I copied a layer mask from above in order to reveal the effect on only the background.  To copy layer masks from one layer to another hold Alt (Win) / Opt (Mac) and click, hold, and drag a layer mask.  

I also wondered what the image might look like with only one eagle so I removed the bird on the left.  To do this I first selected the left most eagle with the Quick Select Tool and then Filled using Content Aware Fill.  This did most of the job but left a few places to touch up with the Healing Brush and Clone Stamp.  Finally, I cropped a bit differently. 

In the end, the eagle is too centered for my taste.  Normally the center is deadly (As Rick Sammon likes to say.)  Potentially, an argument could be made that the extended depth of field allows the viewer to leave the centered eagle and explore the in focus, interesting background.  Regardless, I think this image will only serve as a demo.

Fiat Lux!

In tutorial Tags Alaska, eagle, bald eagle, Hal Schmitt, Bull Schmitt, Lightroom, Photoshop, digital photography, DOF, Adobe
Comment

Head On Eagles

June 8, 2010 Light Photographic Workshops

All shots with Canon 1D Mk III, EF 800 mm f/5.6L, Induro CT313, and Really Right Stuff support gear.

We'll have next year's Alaska yacht trips up on the blog and schedule today or tomorrow.

In class this week with Tim Grey and Photoshop CS5.

If you missed it, Lightroom 3 ships today. 

Fiat Lux!

In for fun Tags eagle, bald eagle, Alaska, Hal Schmitt, digital photography
Comment
Use the code "LightWorkshops" and receive 15% off of Photomatix Pro.

Use the code "LightWorkshops" and receive 15% off of Photomatix Pro.

  • Adobe
  • Alaska
  • Bull Schmitt
  • California Photo Festival
  • Canon Explorer of Light
  • Click!
  • digital photography
  • Hal Schmitt
  • HDR
  • Lightroom
  • Lightroom 4
  • panorama
  • photo tour
  • Photoshop
  • Really Right Stuff
  • Rick Sammon
  • Topaz Labs
  • Victoria Schmitt
  • video
  • wildlife photography

ARCHIVES BY DATE

  • March 2015 (1)
  • September 2014 (1)
  • August 2014 (1)
  • July 2014 (3)
  • June 2014 (1)
  • May 2014 (1)
  • April 2014 (2)
  • November 2013 (3)
  • October 2013 (3)
  • September 2013 (6)
  • August 2013 (5)
  • July 2013 (2)
  • June 2013 (4)
  • May 2013 (5)
  • April 2013 (4)
  • March 2013 (6)
  • February 2013 (3)
  • January 2013 (3)
  • December 2012 (4)
  • November 2012 (1)
  • October 2012 (3)
  • September 2012 (3)
  • August 2012 (5)
  • July 2012 (2)
  • June 2012 (5)
  • May 2012 (4)
  • April 2012 (4)
  • March 2012 (2)
  • February 2012 (1)
  • January 2012 (6)
  • December 2011 (1)
  • November 2011 (2)
  • October 2011 (2)
  • September 2011 (13)
  • August 2011 (9)
  • July 2011 (9)
  • June 2011 (5)
  • May 2011 (18)
  • April 2011 (7)
  • March 2011 (10)
  • February 2011 (12)
  • January 2011 (7)
  • December 2010 (6)
  • November 2010 (5)
  • October 2010 (3)
  • September 2010 (7)
  • August 2010 (2)
  • July 2010 (20)
  • June 2010 (6)
  • May 2010 (4)
  • April 2010 (8)
  • March 2010 (12)
  • February 2010 (8)
  • January 2010 (9)
  • December 2009 (9)
  • November 2009 (13)
  • October 2009 (18)
  • September 2009 (25)
  • August 2009 (38)
  • July 2009 (26)
  • June 2009 (18)
  • May 2009 (9)


BLOG     |     NEWSLETTER     |    VOLATUSWINE

The images on this website are protected by federal copyright registration by each individual photographer/creator. Any unauthorized use is a federal offense with penalties of up to $150,000. Unauthorized use includes any copying of images from this site.

SIGN UP TODAY FOR ONE OF OUR PHOTOGRAPHY WORKSHOPS AND TAKE YOUR PHOTOGRAPHY TO THE NEXT LEVEL!​